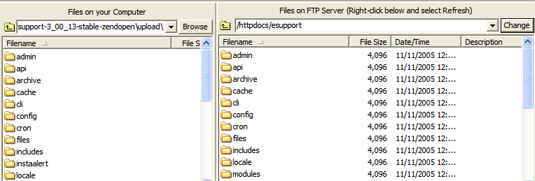
There are several methods available to transfer the files from your computer to your web server. The most common method in use is transfer via FTP. Currently there are various third party FTP client application available. We suggest you use popular applications like CuteFTP or BulletProof FTP to upload the files onto your web server. For this example we will use BulletProof FTP to proceed with the installation.
Most FTP client applications will upload PHP files in ASCII format, this needs to be changed before you upload the files onto your web server. eSupport/LiveResponse/SupportSuite uses Zend Encoder and IonCube Encoder to protect the source code which requires the PHP files be uploaded in Binary format as uploading the files in ASCII format will print out errors.
Connect to your FTP server and with the new files in the local panel and the existing files in the remote panel.

Now, select all the files and directories from your computer except the config directory. You do not need to replace the config directory.

Now drag all the selected files in the folder from its location on your computer’s hard disk to the web publishing folder on the server.

This is will place all the files in queue. You now have to command the FTP client to initiate the transfer of files by pressing the Go button – 
Depending upon the speed of your internet connection, uploading all the files could take several minutes to complete. On initializing the upload, you will most likely be prompted by the FTP client asking if you want to overwrite the existing files. You should confirm this prompt, telling the FTP client that yes, you do want to overwrite the existing files. If the prompt gives you the option to overwrite all existing files without prompting again, use this option.

Setting Directory and File Permissions
Now that you have uploaded the new files onto your server, it is now time to set the correct permissions for specific files and directories. You now need to change the permissions of the directories “cache” and “files“. The software set up script will not run if the directory permissions are not changed. Assuming you are yet connected to your server via FTP, select both the directories, right click on them and change the attributes to ‘777‘ (non-windows server) using the chmod command.
